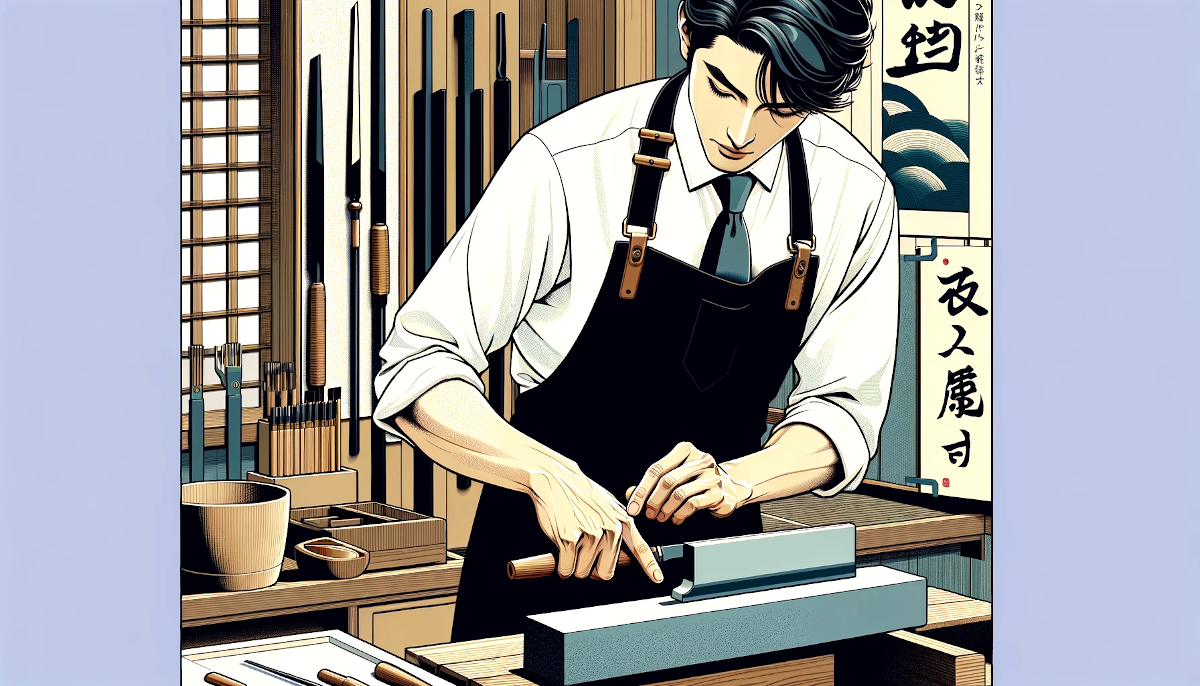
In woodworking, mastering the skill of sharpening chisels is indispensable for fast and precise wood processing. However, this task is often perceived as challenging, especially for beginners. Indeed, acquiring this skill demands practice and is not something that can be achieved overnight. Nonetheless, with the right techniques and consistent practice, anyone can enhance their own skills.
This DIY-focused guide provides detailed explanations not only on the sharpening of chisels and the use of whetstones but also on basic stances and grips. Take up the challenge of chisel sharpening and refine your skills with the craftsmanship of a Japanese artisan.
日本語版の記事(鑿(ノミ)の研ぎ方【砥石の使い方】プロの大工が解説)はコチラ
List of Contents
Article Author
Kentarou Fukata
A Kyoto, Japan native born in 1985, I am a seasoned carpenter boasting five national qualifications in housing-related disciplines in Japan. Committed to the dissemination of carpentry expertise, I actively contribute to professional development within the field through instructional content on YouTube.
Chisel Sharpening Tutorial Video
Whiteboard Session: Explanation of Principles
Complementing the guide is an informative video designed to augment comprehension.
If you wish to utilize features like subtitles, please reopen the video on YouTube. You can access the subtitles through the ‘CC’ button on the playback screen or in the settings.
Chisel Sharpening Demonstration Video
Understanding the nuances of chisel sharpening can be challenging without seeing it in action. Therefore, I’ve also created a video that showcases the actual sharpening process.
The Relationship between Japanese Blades and Whetstones

To effectively sharpen a blade with a whetstone, one must understand the underlying principles of the process. I will elucidate the symbiotic relationship between the globally recognized sharpness of Japanese blades and the meticulous refinement offered by Japanese whetstones.
Materials of Japanese Blades: Steel and Soft Iron
Japanese blades are crafted combining steel and soft iron.
※Blades made entirely of steel can be manufactured cheaply but are not suitable for delicate sharpening due to the time it takes to grind them.
Characteristics of Steel (Hard Iron)
Steel is extremely hard and, when sharpened properly, forms a blade that cuts exceptionally well. Blacksmiths adjust the essential characteristics of blades, such as hardness and flexibility. If the hardening of steel is insufficient, the blade tends to wear down in a manner where the edge gets crushed. Conversely, if the steel is overly hardened, it becomes brittle and may shatter under excessive force, resulting in a fragile blade.
Characteristics of Soft Iron (Iron with Impurities)
Soft iron (base metal) is more prone to rust and bending under pressure than steel. However, soft iron is crucial for sharpening blades. It’s easily worn down during sharpening, allowing for delicate shaping. Additionally, it produces a significant amount of ‘sharpening sludge,’ acting as an abrasive to wear down the hard steel.
The Value of Steel and Soft Iron
Historically, steel was very precious. Blades made by combining soft iron were initially intended as a cost-effective manufacturing method. However, with advancements in steel refining technology, steel has become more accessible. Conversely, soft iron, rich in impurities and malleable, cannot be newly produced, making it highly valuable. Therefore, the quality standards of Japanese blades today are determined by how much soft (impurity-rich) iron is obtained and used in their creation.
Additionally, soft iron hardens and loses impurities with repeated forging. Blacksmiths are challenged to minimize forging to preserve the softness of the base metal in the blade.
Sharpening Process and Sharpening Sludge
The Role of Sludge in Sharpening
When sharpening a blade on a whetstone, particles of the stone, metal, and water mix together. This mixture forms a mud known as ‘sharpening sludge,’ which acts as an abrasive to wear down the blade. Japanese blades, which are composite edges of steel and soft iron, have a synergy where the sludge from the soft iron is used to polish the steel blade. Understanding this principle is vital in the art of blade sharpening.
Fineness of Whetstone Particles and Hardness of the Whetstone
In the act of sharpening, both the blade and the whetstone wear down. Furthermore, finishing whetstones and medium whetstones differ not only in grit size but also in hardness. Finishing stones are hard, making both the blade and the stone resistant to wear. Conversely, coarse stones tend to be softer and wear down more easily. The hardness of whetstones is adjusted for each product, even within the same grit size, and this hardness significantly alters the sharpening experience. Ideally, one should choose a whetstone with a hardness that facilitates easy sharpening for the specific blade being sharpened.
Chisel Sharpening Basics: Key Techniques & Tips

The process of sharpening chisels involves meticulously reducing the metal blade while simultaneously making subtle shape adjustments. The posture during sharpening is critically important for the efficient transfer of force and the swift mastery of sharpening skills. We will introduce the fundamentals of stance and grip that have been traditionally upheld by Japanese carpenters. Please note: the following instructions are given assuming right-handedness. If you are left-handed, please adapt the instructions accordingly to suit your dominant hand.
Posture in Sharpening: The Key to Effectiveness

First, place the block in a stable position at your feet. (If it moves or wobbles, sharpening will not be effective.)
Then, place your right foot so that the toes are about 2cm in front of the block and squat down. Be mindful to keep your knees and buttocks from touching the ground, imagining your right knee coming in front of your chest.
In that posture, position the whetstone just in front of the block and sharpen while your eyes are directly above the stone.
Sharpening involves a back-and-forth stroke motion, but envision applying pressure when pushing forward.
During the stroking motion, tighten your core above your navel to stabilize your body and prevent any front-to-back swaying. This sensation can be easily felt by holding your breath while sharpening, as it naturally engages your core. Give it a try.
Mastering the Grip for Safe, Precise Sharpening
Sharpening the Bevel
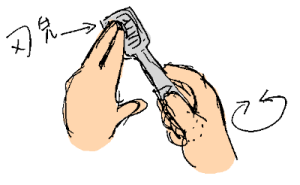
Hold the handle with your right hand as if wrapping around it, and position the chisel slightly diagonally against the whetstone.
Use your left index and middle fingers to hold down the blade.
For lateral adjustments while sharpening the blade at a right angle, apply a twisting force with your right hand on the handle.
During the stroke, focus on the blade held by both hands and apply pressure when pushing to sharpen.
Sharpening the Flat Side

Place the back side of the chisel perpendicular to the whetstone for sharpening. Since the flat surface serves as a ruler, it becomes unusable as a chisel if it gets rounded. Maintain a perfect plane while applying pressure to the blade’s tip, ensuring that the wear occurs from the tip.
Specifically, pinch the chisel’s neck with the index finger and thumb of your right hand to maintain its height, while applying an upward supporting force with your ring and little fingers at the handle’s end. *Note: Apply supporting pressure without actually lifting.
Then, similar to sharpening the bevel, firmly press the blade’s cutting edge with the index and middle fingers of your left hand, and perform the stroking motion back and forth. If the entire back side is in contact with the whetstone and only the cutting edge shows slurry, it’s a sign of successful sharpening.
*Note: To avoid uneven wear, the flat back is often sharpened exclusively with a finishing whetstone.
About Sharpening the Shinogi (Surface)
Sharpening the shinogi (surface) into a flat plane certainly adds an aesthetic appeal and makes the sharpening appear more skillful. However, remember that a chisel is fundamentally a tool for woodworking; its shape (like the back side or the right angle of the cutting edge) and sharpness take precedence over appearances. Even if the shinogi becomes rounded, it won’t hinder woodworking. Practicing sharpening without also practicing woodworking is pointless. Aim to improve your sharpening skills as your woodworking skills advance.
Chisel Sharpening: A Step-by-Step Guide

Preparing for Sharpening
Soaking the Whetstone
All Japanese whetstones require saturation before use; they cannot be used dry. Submerge the stone in a bucket of water for a while to ensure it is thoroughly soaked. While it’s possible to store the stone in water during periods of frequent use, be mindful that prolonged immersion can alter some stones. Therefore, it’s important to be cautious and aware of the stone’s material and recommendations.
Flattening the Whetstone
The process of smoothing the whetstone is referred to as “truing”. For sharpening woodworking chisels, the method involves rubbing the surface of the stone against a flat block. Using sand in the process accelerates it, as the direct rubbing might not be effective enough for wear. When the wet stone comes into contact with the sand, it slightly adheres, knocking off the larger particles from the block and leaving behind only the finer ones suitable for flattening. After truing, if the finishing stone’s surface is rough from sand scratches, smooth it out by rubbing it against a medium-grit stone.
Personally, I use a coarse-grit stone instead of sand. Rubbing a coarse diamond-type stone against the block creates a slurry of fine, hard particles, which quickly and efficiently flattens the whetstone.
Coarse Sharpening (Medium Grit Stone)
Once prepared, you can begin the coarse sharpening stage. The purpose of coarse sharpening is to shape the blade in preparation for the fine sharpening. Typically, for a chisel, this is done using a medium grit stone (about 1000 grit). It’s important to focus on sharpening only the surface, even if there is wear on the back, and to re-sharpen only the area that was worn down from previous use.
Cleaning the Whetstone
When starting to sharpen with a freshly trued stone, wash away any particles, such as the sand used for truing, since they are coarser than the grit of the sharpening stone and could interfere with the sharpening process.
Generating a Slurry (Swarf)
The sharpening process can utilize a mixture of stone, metal, and water called “swarf” as an abrasive. Therefore, when you begin sharpening on a clean, trued stone, the first step is to generate this swarf.
The method is straightforward: normal sharpening will naturally produce swarf, but understanding that generating swarf and sharpening the blade are separate parts of the process can make your work smoother.
For instance, generating swarf with a narrow-width chisel can be challenging. While it’s ideal to use the entire surface of the stone, if swarf is difficult to produce, reducing the sharpening area is also a valid method.
Checking the Sharpening Progress
To check the sharpening progress, observe for a “burr,” which is a slight catch felt when sliding your finger from the base to the tip on the backside of the blade. The presence of a burr indicates that the blade edge has been ground down sufficiently and you can move to the next step of the sharpening process.
Length of Sharpening Strokes
Since a whetstone gradually wears down with use, utilizing the entire surface is more efficient and ideal to avoid waste. However, not everyone can manage this at first. Until you’re accustomed to it, starting with short strokes (about three times the width of the blade) while generating swarf is perfectly acceptable. Of course, if you’re able to use longer strokes over the entire stone, you’ll find the sharpening to be more efficient and quicker. Once you’re comfortable with sharpening, try extending your strokes to cover the whole stone.
Precautions for Using a Grinder
Using a grinder can generate frictional heat, which has the potential to alter the steel (softening hardened steel) and render the blade unusable. If there is significant chipping on the blade that necessitates a grinder, consider seeking professional sharpening services. For smaller blades like chisels, minor nicks can be ground out by hand using a coarse whetstone.
There exists a tool that hones blades by spinning a round whetstone and utilizing water. This tool is designed for advanced users. Unlike a grinder, it does not alter the steel’s properties, but mastering this device can be challenging without the skills of hand sharpening.
Recommendation for Repairing Chipped Blades
For reshaping chipped blades, I recommend using a coarse whetstone. The diamond whetstone that I use can grind down more than 1mm off a chisel in about five minutes. Additionally, when used correctly, this stone allows for quick adjustment of the blade’s shape. Please note that stones coarser than this grade are not suitable for sharpening blades.
Finishing Sharpening
Finishing sharpening essentially follows the same principles as coarse sharpening, starting with the generation of swarf. When sharpening narrow-bladed chisels, the limited sharpening area can make it challenging to produce swarf. In such cases, gently rubbing a specialized finishing whetstone called “Nagura stone” on the surface of the stone can remove excess water and expose the grit particles, making it easier to generate swarf.
During the finishing grind, aim to create a pitch-black swarf (which turns black due to the mixture of iron filings), and sharpen as if you are kneading the blade into the stone. If the swarf starts to dry, scoop a little water from a bucket with the tip of the chisel to moisten the swarf and continue sharpening. Too much or too little water can disrupt the process, so gradually add water to maintain a mud-like consistency for optimal sharpening.
Finishing Sharpening of the Back Side
In the final sharpening stage, the back side of the blade is also honed on the finishing stone. Care should be taken to ensure that the base of the blade back does not wear down excessively. Maintain a perpendicular angle to the stone during your strokes. Observing the sharpened edge, you can assess the quality of the finishing sharpening and the level of smoothness by the shine of the sharpened surface.
The Honing Process
The “burr” created during coarse sharpening with a coarse stone will become thinner when honed on a finishing stone. This burr should not be forcibly removed with your fingers. After completing 30 strokes on the face side, turn to the back side for 20 strokes, then back to the face for 10 strokes, and continue alternating between the two, gradually reducing the number of strokes. When you get down to 5 strokes each and the burr on the blade’s edge has disappeared, the honing is considered complete.
Benchmark for Sharpness
The sharpness of a woodworking chisel should aim to be on par with that of a new cutter knife. You can test the sharpness by shaving the hair on your arm. A cutter knife is sharp enough to shave off about half of the arm hair. If your chisel reaches a similar level of sharpness, it is sufficiently honed for woodworking. However, note that chisels are sharpened at a blunter angle (about 38 degrees) compared to cutter knife blades to enhance durability. If you find the sharpness lacking, adjusting the angle to be slightly sharper may improve the cutting performance.
Don’t Forget the Rust Prevention
Sharpened edges are highly susceptible to rust, and rusting can quickly diminish the hard-earned sharpness. Make it a habit to apply rust prevention within 30 seconds after sharpening. The type of oil used doesn’t matter. However, use it sparingly; applying too much can make the blade sticky and complicate subsequent sharpening.
Essentials for Sharpening Woodworking Chisels
Let’s organize and introduce the necessary tools for sharpening work, including recommended products (including promotional items).

Whetstones (Water Sharpening)
For sharpening woodworking chisels, you will need two types of whetstones: a medium-grit stone (around 1000 grit) for intermediate sharpening and a finishing stone (ranging from 5000 to 10000 grit) for final sharpening.
Medium-Finish Whetstone
This is a medium-grit whetstone from the Japanese brand King, well-suited for sharpening chisels. Its affordability and ease of use make it popular among professional carpenters. Known for its red color, it’s also referred to as the “Red Whetstone.”
Finishing Whetstone
King’s finishing whetstone is one of the many options available from various whetstone manufacturers in Japan. However, King whetstones are particularly recommended for sharpening woodworking chisels and Japanese knives due to their superior quality.
Additional Tools Required for Chisel Sharpening
Concrete Block
A construction-grade concrete block, typically used for walls. These are readily available at home improvement stores at an affordable price.
Water (Bucket or Garden Sprayer)
Water is essential for sharpening blades. For chisels and knives, a bucket of water is sufficient. Note: A garden sprayer is used for sharpening hand planes.
Oil (Rust Preventative)
After sharpening, you’ll need oil (such as silicone spray) to prevent rusting. Any oil that prevents rust will do.
Although the primary purpose of silicone spray is as a lubricant, many prefer it over regular oil as it’s less greasy and easier to handle.
Whetstone Holder
To prevent the whetstone from slipping on a concrete block and to sharpen effectively, please prepare a whetstone holder that serves as a non-slip base. You can also make your own whetstone holder.
Note: In the absence of a whetstone holder, placing the whetstone on a wet cloth can serve as a temporary solution to prevent slippage.
Conclusion
Did you find the information helpful?
Mastering the art of sharpening and handling chisels is a skill learned through physical practice, but it doesn’t need to be overly complicated. As you enjoy crafting, your proficiency will naturally improve.
Skills gained from chisel work can be applied to numerous power tools, and once you master sharpening a chisel, you’ll also be able to sharpen other blades like knives. I encourage you to take on the challenge and learn the fundamental skills of using a chisel.
