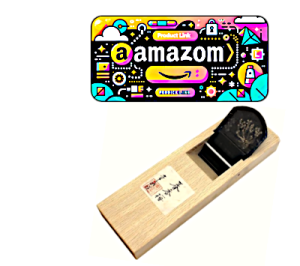
The hand plane, also known as “Wa-Kanna” in Japanese, is renowned as one of the most sophisticated tools in the arsenal of Japanese carpentry. It is an indispensable tool for professional carpenters, cherished not only for its essential role but also for its precision, which endears it to enthusiasts.
This article compiles tips and techniques gleaned from the experiences in professional carpentry skills tests, competitions, and practice sessions in Japan. While it contains specialized content, it will undoubtedly be of great value to hobbyists keen on honing their skills. Let’s master the art of the hand plane together and enjoy the craft!
日本語版の記事(鉋(かんな)の使い方(調整法)まとめ【プロの大工用】解説動画あり!)はコチラ
List of Contents
Article Author
Kentarou Fukata
A Kyoto, Japan native born in 1985, I am a seasoned carpenter boasting five national qualifications in housing-related disciplines in Japan. Committed to the dissemination of carpentry expertise, I actively contribute to professional development within the field through instructional content on YouTube.
Introduction Video
Complementing the guide is an informative video designed to augment comprehension.
If you wish to utilize features like subtitles, please reopen the video on YouTube. You can access the subtitles through the ‘CC’ button on the playback screen or in the settings.
Fundamentals of Japanese Hand Planes

Usage and Functionality of Japanese Hand Planes
A hand plane, simply put, is a tool used for shaving wood to make it flat. Its structure consists of a plane bed made of oak wood, into which the main blade for shaving wood and the chipbreaker for controlling tear-out are inserted. The plane bed also serves as a ruler, ensuring that the planed wood has a flat surface. The method of use involves pulling the Japanese hand plane towards oneself to shave the wood.
In Japan, there has been a long-standing tradition of finishing wood in its natural, uncoated state, and spaces such as Japanese-style rooms are entirely finished using hand planes.
The Principle of the Chipbreaker in Preventing Tear-Out
When wood is planed against the grain, the blade digs into the material. This digging in during planing, which results in a rough finish on the surface, is known as “tear-out.” Japanese hand planes are equipped with a chipbreaker to prevent this tear-out. The principle is that when the main blade shaves the wood, attempting to lift the surface, the chipbreaker’s tip breaks the wood fibers at that moment, controlling the blade’s penetration and allowing for smooth planing.
Method for Adjusting the Blade Protrusion of a Hand Plane

Method for Adjusting the Main Blade
Extending the Main Blade
The thickness of the shaving by a hand plane is adjusted by the amount the main blade protrudes from the plane bed. To extend the main blade, you tap the head of the blade. The head of the main blade is made of soft iron, which gradually deforms with each tap. The sides of the main blade are also the moving parts within the plane bed’s slot (where the blade fits), and if it becomes too deformed and widens, adjustment becomes difficult. Moreover, a flattened head on the sides is aesthetically unpleasing, so the goal is to tap only the tip of the head for adjustment.
Note: A wooden mallet is ideal for these adjustments.
Retracting the Main Blade
To retract the main blade, you tap the head of the plane bed. The angle at which the plane bed is tapped is often mistaken. When storing the main blade, ensure to tap straight down in alignment with the direction of the plane bed. You might think tapping diagonally at the same angle as the blade would make it easier to retract, but since the plane bed is made of wood, tapping at an angle can damage it.
Regarding where to tap, strike only the two ends (upper side) of the plane bed’s head. The central part of the plane bed’s head is structurally weaker (due to the hole for inserting the blade), and tapping too hard can cause cracks. And, of course, never tap the lower part of the plane bed, which is finely adjusted as a ruler, to prevent deformation.
Fine-tuning the Protrusion of the Main Blade
Adjusting the Blade’s Lateral Distortion
Sometimes, due to the way the main blade is inserted, it may tilt, causing uneven protrusion on the left and right sides (resulting in uneven shaving thickness). To correct this, retract the blade and then adjust. Specifically, press the head of the main blade in the desired direction with your finger, and tap the edge of the plane bed (on the side you want to adjust) to align it. Additionally, when inserting the main blade, tapping it while directing the head in the desired direction can further refine the adjustment.
Checking the Protrusion of the Main Blade
The protrusion of the main blade is visually checked from the underside of the plane bed (the ruler surface). However, when the blade protrudes only slightly, it may be difficult to see. In such cases, you can also feel it with your finger to confirm. Ultimately, test by planing and observe the thickness of the shavings to make a judgment.
Back Blade Adjustment Technique
Method of Adjusting the Reverse Blade
To adjust the back blade, insert it over the settled main blade, ensuring that its back surface aligns properly. Gently tap the back blade along the main blade with a hammer, employing a sliding motion. This process, known as “tightening,” requires caution to avoid overdoing it. Excessive tightening may cause the back blade to protrude beyond the main blade’s edge, potentially ruining the meticulously sharpened main blade.
The ideal position of the reverse blade varies depending on the thickness of the material being planed. For finishing planes, the ideal position of the back blade is a hair’s breadth behind the cutting edge of the main blade.
Verifying the Protrusion of the Back Blade
Identify the angle at which the gap between the back blade and the main blade is accentuated by surrounding light. Visually check and adjust the protrusion of the back blade. After a rough adjustment, test the blades by actually shaving wood. Examine the consistency and wave pattern of the shavings. The ideal state of tightening allows for smooth drawing, evenly waved shavings, and prevents “counter-grain” issues.
To retract the back blade, tap the ‘plane block’ head, drawing both the back blade and the main blade back. Then, lightly tap the main blade to restore its original position. Generally, you cannot independently retract the back blade.
Structure of the Japanese Hand Plane: Explanation of Each Part

About the Main Blade
In adjusting Japanese hand planes, not only is the sharpness of the main blade critical, but its shape is also of paramount importance. These two attributes are realized through meticulous sharpening. This process is considered one of the most challenging when working with Japanese hand planes.
Structure of the Plane Blade (Japanese Forged Blade)
Japanese carpentry tools like hand planes and chisels are hand-forged by blacksmiths, known as ‘forged blades’. Most Japanese forged blades, including plane blades and knives, are single-beveled.
Japanese single-beveled blades feature a multi-layered structure consisting of a concave steel surface and a soft iron layer (base metal). The steel surface, known as ‘Ura’ (the back), and the base metal surface, which is beveled, is referred to as ‘Omote’ (the front).
Overall Shape of the Main Blade
Due to structural considerations of the hand plane, it’s not feasible to utilize the entire width of the main blade as the cutting edge. The maximum width of the cutting edge is dictated by the width of the plane’s mouth. The side faces of the main blade serve as movable parts with the plane body, and shaving these parts would lead to clogging of the plane shavings within the body. Therefore, the main blade needs to be chamfered to match the width of the mouth, a process known as “ear dropping.” I usually chamfer about 4mm.
Shape of the Sharpened Surface on the Front of the Main Blade
The sharpened surface on the front side of the hand plane’s main blade should be ground to a perfect flat plane. The edge of the hand plane is adjusted to be straight to smoothly and widely shave the wood. This is achieved when a perfectly flat front surface meets a perfectly flat back surface at the blade’s edge. Additionally, the chamfered area, known as the “ear dropping” near the blade’s corner, must be smoothly ground down to ensure it doesn’t leave cutting marks on the wood.
Shape of the Back Surface of the Main Blade
The steel backside of the main blade is meticulously honed to achieve a perfect flat plane. The concave design of the backside is an ingenious feature to facilitate the maintenance of the steel surface’s flatness, which is inherently hard and resistant to wear. This underlines the significance of the backside’s flatness for plane blades, a factor that is so crucial it’s taken into account right from the development stage of the tool.
About “Ura-dashi” and “Ura-oshi”
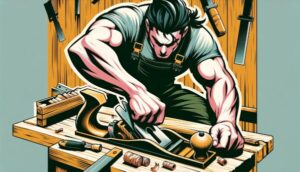
“Ura-dashi”: The Technique of Altering the Blade’s Shape by Hammering
“Ura-dashi” is a technique where the soft iron part (base metal) of the main blade’s front sharpened surface is gently hammered to subtly bend and shape the entire blade. However, this technique carries the risk of damaging the hand plane. Accidental tapping on the steel part can cause cracks in the steel, rendering the plane unusable for finishing work. Therefore, I do not recommend beginners attempt “Ura-dashi.” If you decide to try it, be prepared for the possibility of damaging your valuable hand plane and proceed with utmost caution and preparation.
Uraoshi: Technique for Correcting the Flat Surface of the Backside
The backside of a hand plane (the steel part) is resistant to wear from finishing stones, making it challenging to restore its sharpness if its flatness is compromised. ‘Uraoshi’ refers to the process of grinding the distorted steel backside to return it to a flat surface.
There are two methods: one uses a sharpening stone, and the other, a traditional ‘kinban’ (metal plate). However, I recommend the sharpening stone method. The traditional method, unless specifically intended to preserve ancient culture accurately, is unnecessary. In the past, it was difficult to correct the flatness of stones, which led to the adoption of this method. Nowadays, it’s easier to correct the flatness of stones, making ‘uraoshi’ with a stone possible. For stone usage, I suggest using around a 2000-grit stone.
Also, the old method involves placing a wooden stick over the blade and applying pressure to the protruding part on the blade side to shave the back blade. I do not recommend this method either. The ‘uraoshi’ process requires the same skill as finishing sharpening. If you get used to pressing the blade with a wooden stick, it becomes difficult to sharpen the blade properly during finishing sharpening. Hence, I recommend practicing without the stick.
Regarding the Shape of the Reverse Blade

The chipbreaker is mounted behind the main blade to arrest tear-out by crushing the shavings’ fibers with its cutting edge. The edge of the chipbreaker should be set slightly back from the main blade’s edge, approximately the width of a hair, and adjusted by tapping into position.
Shape of the Reverse Blade Edge
The edge of the reverse blade is subjected to a two-stage sharpening process, making the tip of the blade more obtuse. When planing thicker wood, it is necessary to enlarge the two-stage obtuse sharpening area. Consequently, the gap width settings between the main blade edge and the reverse blade edge also need to be increased.
Adjusting the Fit of the Reverse Blade (Creating a Protrusion Gap)
The head of the reverse blade is equipped with protrusions (similar to the legs of a table) to maintain a gap thickness with the main blade. The blade edge and these two protrusions fit against the back side of the main blade. If there is any play in the fit between the main and reverse blades, shavings can get stuck between the two blades, preventing proper planing. Therefore, please adjust and stabilize the tips of the protrusions.
To extend the protrusions, place the base of the protrusion on an anvil and strike the tip firmly. Conversely, it is also possible to trim the tip of the protrusion for adjustment. However, this may weaken the holding strength of the reverse blade, making it more difficult to adjust blade exposure.
Regarding the Width of the Reverse Blade
The reverse blade also undergoes lateral distortion adjustment, necessitating approximately a 1mm gap relative to the width of the plane body’s slot. When purchasing a hand plane, if this gap is too narrow, ensure there is enough margin to adjust the reverse blade by sharpening. This margin should not be excessively large. If sharpening leads to increased distortion beyond the range of adjustment, correct the distortion by re-sharpening the blade edge.
Regarding the Shape of the Plane Base (Sole Surface)
The fundamental shape of the sole surface, or “plane base,” of Japanese hand planes is a completely flat surface. In Japanese materials, the basics of adjusting the plane base are often taught as “three-point contact.” Beginners tend to interpret this quite literally, leading to a tendency to form the base extremely. It is essential to note that the concept of three-point contact pertains to very fine precision issues. The more precise the adjustment, the closer it gets to a completely flat surface.
Basics of Plane Base Adjustment: “Three-Point Contact”
The concept of “three-point contact” refers to three specific lines on the plane base: the front edge line, the rear edge (base tail), and the line in front of the blade. Any twist or misalignment in these three points can impact the precision and shape of the finished wood surface. The essence of three-point contact lies in ensuring that “no part other than these three lines should protrude.”
Method to Eliminate Protrusions in Parts Other than the Three Lines
Place a straightedge on any two of the three lines and give it a light shake (holding the center of the straightedge and shaking the ends). This allows you to identify any protruding parts of the plane base by the straightedge catching on them. If the straightedge does not catch on any part other than the three lines, it achieves “three-point contact.”
A word of caution: if the gap between the straightedge and the plane base is visibly discernible, it indicates over-planing. Over-planing can result in unevenness on the plane base, impairing the hand plane’s essential function of shaping a flat surface on the wood.
Practical Adjustment Method: “Plane Base Correction”
Up to this point, we have been discussing the basics. When actually using a hand plane, it’s important to keep these basics in mind while making simple adjustments to the plane base, a process known as “plane base correction.”
Firstly, if the current adjustment is working well and you’re able to plane smoothly, there’s no need to force any corrections. Adjusting by planing the plane base can reduce its thickness. This, by design in Japanese hand planes, widens the mouth (the gap between the blade and the body), potentially shortening the lifespan of the plane base. Therefore, instead of adhering strictly to the basic methods and constantly making corrections before use, it’s better to assess the current performance and make corrections only if there are issues.
Practical Method for “Plane Base Correction”
If you notice a decline in performance while planing wood, hold the bottom surface of the plane base up to a light source. Bulging areas on the plane base can be identified by the sheen created through friction with the wood. Then, selectively plane and correct these areas, adhering to the principles of “three-point contact.”
For the correction planing, there are specialized tools called “plane base correction planes.” However, if you don’t have one, sandpaper and a wood chisel are adequate substitutes. When using a wood chisel, plane by pulling the blade vertically. If using sandpaper, use it with a sanding block. A crucial point to note when using sandpaper is to thoroughly remove all sand particles from the plane base after sanding, as these particles can damage the main blade or the wood surface you’re working on.
Subtle Caution for “Plane Base Correction”
Ensure to perform “plane base correction” with the main blade inserted. The insertion of the main blade slightly bulges the bottom surface of the plane base, which can disrupt the precise accuracy of the “plane base correction.” This disruption often confuses beginners working with hand planes. So, if you ever feel that something is off, remember this point.
Using a Japanese Hand Plane (Shaving Technique)

Foundation of the Pulling Technique
When using a Japanese hand plane, the basic principle is to pull it parallel to the material. Applying pressure while pulling results in thicker shavings, while less pressure produces thinner ones. When working on smaller pieces, it’s crucial to ensure that the base of the plane’s flat surface (the underside) is properly aligned with the surface, maintaining even strokes during the shaving process. Deviating from a straight path can lead to an uneven and rounded finish.
Preparation Angle and Planing Technique Tailored to the Material
In Japanese residential construction, the soft, white part of “cedar” is frequently used. However, it’s a challenging material to plane due to its excessive softness. For such soft materials, hand planes with a smaller blade angle (more acute angle relative to the plane base) yield better results. However, it’s not always necessary to create a plane base at a special angle. Simply tilting the plane base diagonally against the material can mimic the effect of having a smaller blade angle, facilitating a smooth finish.
Note: With soft materials, achieving a clean finish can be challenging if the planing thickness is too thin. It’s crucial to adjust the planing thickness according to the characteristics of the material.
Initial Setup of Japanese Hand Planes

Japanese hand planes are not ready to use straight out of the box. They are sold with the main blade not fully set into the plane base, and forcing the blade in could split the plane base. Properly fitting the main blade requires careful adjustment by shaving the movable part of the plane base where the main blade is inserted.
Initial Blade Setting Method
First, remove the main blade from the plane base and mark the entire blade with a pencil. Return the blade to the plane base, lightly tap it in, and then remove it again. This will transfer the pencil marks onto the plane base hole. Gradually shave these marked areas using a wood chisel or sandpaper, and repeat this process until the blade fits appropriately.
Be careful not to shave too much, as it can make adjusting the blade protrusion difficult. Initially, the plane base tends to compress and loosen the fit. It’s advisable to set it a bit tight at first.
Also, allow about 1mm of leeway in the blade width direction to adjust for any left-right skew of the main blade.
Special Setup: “Oil Soaking”
In some regions, there is a culture of soaking plane bases in oil before use. When purchasing a hand plane, the practice involves immersing the plane base in oil for about a year before use. The rationale behind this is said to be improved smoothness in planing and enhanced durability of the plane base.
I once tried this “oil soaking” method with the first hand plane I purchased. However, I found the drawback of getting my hands dirty and did not perceive any significant benefits. In my opinion, it might be better to start using the plane earlier and increase practice opportunities rather than leaving it idle for a year.
Supplementary Notes on Adjusting Hand Planes
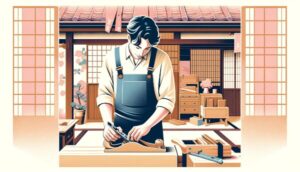
About Single-Blade Planes
Looking back at the history of Japanese hand planes, the currently mainstream two-blade planes with a chipbreaker were actually invented about 100 years ago, primarily for beginners. Considering the long history of Japanese architecture, only single-blade planes were used before this invention. Moreover, understanding the principles of single-blade planes is effective for deepening one’s understanding of the adjustment methods of the chipbreaker.
Characteristics of Single-Blade Planes
The single-blade plane, which does not use a chipbreaker, is renowned for its light body weight, ease of handling, and the beautiful finish it imparts on wood. Many craftsmen continue to cherish and use this type of plane.
The principle of countering “tear-out” with a single-blade plane lies in the blade mouth area of the plane base, where the material’s fibers are crushed (pressure is applied) just before being cut by the blade. This prevents the uplifted wood fibers from tearing the finished surface.
Differences in Plane Base Shape between Two-Blade and Single-Blade Planes
For two-blade planes, a wide gap above the hole is necessary to visually inspect the gap width between the edges of the main blade and the chipbreaker. This design feature means that when performing “plane base correction,” the mouth (the gap from the blade to the edge of the base) tends to widen.
In contrast, single-blade planes require a narrow mouth (about 1mm) to suppress “tear-out.” Unlike two-blade planes, even if the plane base is reduced through correction, the mouth does not widen, maintaining its narrow shape.
Adjustment of the Plane Base for Intermediate Finishing Planes
The plane base of intermediate finishing planes (planes used to prepare the surface before using finishing planes) can flatten the material by adjusting the height differences based on the “three-point contact” principle.
Preconditions for Adjustment
Before adjusting this type of plane base, it’s essential to determine the maximum thickness of planing that can be done without causing “tear-out.” ※The thickness that can be planed varies depending on the material. Then, adjust the chipbreaker edge and plane base according to the set planing thickness. Of course, even if an adjustment is made that allows planing a flat surface, changing the planing thickness will disrupt the settings.
Adjusting the Chipbreaker for Thick Planing
When planing thick layers, the chipbreaker requires fine-tuning: adjusting the size of the blade’s obtuse angle and the tightness of its attachment according to the thickness of the planing. If “tear-out” occurs during wood processing, tighten the chipbreaker. However, if “tear-out” persists, consider enlarging the obtuse angle part of the two-stage sharpening. Of course, there are limits to the size of the obtuse angle, as well as to the heaviness of the planing feel and the quality of the finished surface. It’s crucial to consider these factors and find a well-balanced setting.
Specific Adjustment Method for Intermediate Finishing Plane Base
The difference between the plane base for finishing planes and intermediate finishing planes lies in the height of the “three points.” For intermediate finishing planes, shave down just before the main blade line (the center of the three points) to lower it.
Then, plane the wood, check and adjust the height of those three points. Plane the center of the wood’s length, leaving the front and rear ends, until no more can be planed (reaching the limit). After reaching the limit, readjust the three points of the plane base so that the wood surface becomes a perfect plane.
Such adjustments align the compatibility between the finishing plane base and the intermediate finishing plane base. By setting the finishing plane to be able to plane even a slightly concave surface compared to the intermediate finishing plane, a surface that has been planed with an intermediate finishing plane can be assuredly planed with a finishing plane set to an extremely thin planing thickness.

About “Plane Base Wrapping”
The part of the plane base where the blade protrudes in planes sold for finishing is often accompanied by a blade cover known as the “plane base wrapping.” The plane base wrapping is not an essential part of planing, so it’s okay to shave it off if it gets in the way. If the main blade hits the inside of the plane base wrapping, it could cause the plane base to split. In my case, I tend to shave it off from the beginning since it eventually wears out and comes off after repeated “plane base correction,” making it thinner.
About “Mouth Filling”
“Mouth filling” refers to filling the gap known as the “mouth” (the space from the blade to the mouth opening) with hardwood when it widens due to repeated “plane base correction.” I do not recommend this “mouth filling” process. This is because plane bases are usually made of wood (typically oak), which can lead to inconsistencies. If “mouth filling” becomes necessary soon after purchase, it indicates that the material used for the plane base is prone to warping. Even if you fill the mouth, the tendency of the material to distort doesn’t change. Therefore, I recommend replacing the plane base, known as “base replacement.” It’s not overly expensive, and in Japan, you can request this service through a tool shop, where skilled craftsmen can handle the replacement.
Conclusion
Did you find the information on hand planes helpful? Reflecting on my first purchase of a hand plane, I remember going through numerous trials and errors, ultimately ruining it completely. However, those days of youthful obsession have become cherished memories.
Now, as someone who teaches, seeing others passionately engaged in the same endeavor reminds me of the allure of hand planes. I encourage you all to immerse yourselves in the world of hand planes as well.
