The hammer is a crucial tool for various striking tasks, indispensable to both professional carpenters and DIY enthusiasts alike. It serves a multitude of purposes, from driving nails and impacting tools to dismantling and shaping wood, as well as adjusting the position of materials. In this article, experienced Japanese carpenters thoroughly explain, for DIY enthusiasts, the methods of using hammers, the different types of hammers, and even the detailed process of replacing the handle.
日本語版の記事(玄翁(金槌)の使い方【プロが解説】選び方や柄の交換)はコチラ
List of Contents
Article Author

Kentarou Fukata
A Kyoto, Japan native born in 1985, I am a seasoned carpenter boasting five national qualifications in housing-related disciplines in Japan. Committed to the dissemination of carpentry expertise, I actively contribute to professional development within the field through instructional content on YouTube.
Informative Video (Part 1)
This is the explanatory video for the first half of this page. We use visuals to provide in-depth explanations for aspects that are challenging to convey through text.
If you wish to utilize features like subtitles, please reopen the video on YouTube. You can access the subtitles through the ‘CC’ button on the playback screen or in the settings.
Three Key Features to Consider When Choosing a Hammer

When selecting a hammer for carpentry work, it’s essential to look for specific features that a professional carpenter requires. Here are the three key features to consider
Portability
A hammer is a frequently used tool, typically carried in a tool belt, as construction progresses, various finishing materials are installed throughout the site. The handle of the hammer must be chosen to avoid damaging these materials when carried around, and consideration should also be given to the method of carrying it. Therefore, portability is also an important factor to consider when selecting an interior hammer.
Tool Interaction
A hammer is used to strike other tools like chisels, nail pullers (crowbars), and nail setters (punches). When adjusting finishing materials, it’s crucial to avoid damaging them, so carpenters often use a piece of scrap wood as a buffer.
Task-Specific Selection
The nature of the task determines the type of hammer needed. Different stages of construction, like framing, chiseling, interior work, and demolition, require different types of hammers. Carpenters typically carry several types of hammers to match the specific requirements of each job.
Choosing the Right Hammer for Carpentry

Types of Hammer
There are many professions that use hammers, and accordingly, there are various types of hammers.
Head Material (Metal)
The metal of the hammer’s head comes in different types.
The standard type is the all-steel type (entirely made of hard steel).
There are also attached-steel types (only the striking surface is made of hard steel) and stainless-steel types.
The attached-steel type is relatively heavy, giving it a higher weight for its size.
Head Shape
There are hammers designed for specific professions like masonry or sheet metal work.
Even within carpentry, there are traditional double-headed types called “Genno”, and types where one side is shaped for nail pulling or additional nail tightening.
They vary in thickness, slimness, weight, and lightness.
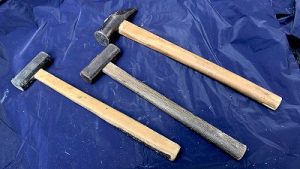
Handle Material (Quality)
Traditionally, hammer handles are made of wood, but wood is vulnerable to water (rain), so there are also metal and plastic handles.
The traditional wooden handle type is characterized by its lightness, making the center of gravity closer to the head, and its flexibility (resilience).
The Ideal Hammer for Carpentry
Considering the various types of hammers available, the ideal hammer for carpenters is known as a “Genno” type.
The reason for this is its ease of use. The wooden handle is lightweight and resilient, making it easy to handle and less tiring for carpenters who frequently use hammers. While some hammers come with nail-pulling or nail-tightening features, these are not functions that carpenters use frequently. For purely hammering purposes, the “Genno” type is the most user-friendly choice.
However, the “Genno” type does have its weaknesses. The iron head is prone to rust, and the wooden handle, when it absorbs water, tends to loosen and deteriorate more quickly upon drying.
Recommended Products
Forged Steel Genno Head (Without Handle)
Standard Boatman Genno (Single-Sided Nail Fastening)
Invaluable Tips for Mastering Hammer Techniques
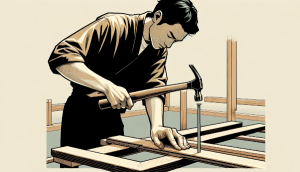
Using a hammer is a task where the skill of a carpenter is blatantly revealed. Acquiring proficiency requires a certain amount of experience, but without practicing the correct handling techniques, one can never truly master it.
Hold the handle long
The optimal position to grip a hammer is where, when you hold the head and align the handle with your arm, it coincides with the position of your elbow. This is said to be the most efficient. Even with a small hammer head, proper handling can produce significant striking power. If you want to practice, it’s recommended to regularly use a small hammer and focus on the way you swing it to deliver powerful strikes.
Use it only for its intended purpose
Don’t twist or use a hammer with a wooden handle as a substitute for a crowbar. This can cause the handle to break.
Tips for driving nails
When driving nails, striking in a downward motion towards your feet allows you to exert more force. This increases the head’s speed and engages your core muscles. When driving nails upward, instead of using a snapping motion, it’s easier to strike by pushing up with your thumb.
Informative Video (Part 2)
This is the second part of our instructional video, providing detailed explanations for the content on this page. We understand that some concepts are better conveyed through visuals rather than text alone.
If you wish to utilize features like subtitles, please reopen the video on YouTube. You can access the subtitles through the ‘CC’ button on the playback screen or in the settings.
How to Tighten a Loose Hammer Handle
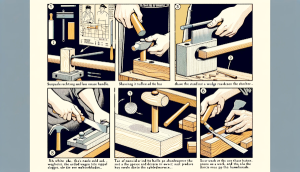
When using a hammer with a wooden handle, it’s common for the handle to loosen over time. Here are some methods for tightening the handle and replacing it if necessary.
Tightening a Loose Handle
When the head of the hammer becomes loose, hold the handle and strike the base of the handle to tighten it. If it tends to loosen frequently, shave the part of the handle that contacts the head of the hammer before striking it in. Finally, secure it by hammering in a wedge.
Replacing the Handle
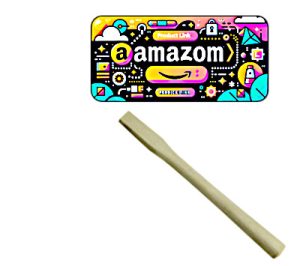
Prepare a Replacement Handle and Wedge
For the handle, white oak (Shirokashi) is recommended due to its durability. Gumi (a type of elm) is also suitable. Avoid hard black woods like ebony as they lack flexibility and can break unexpectedly.
Replacement Wooden Handle (White Oak)
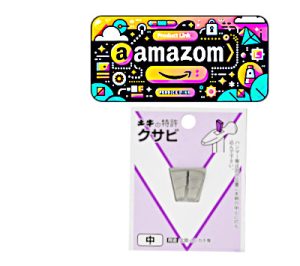
Replacement Wedges
Removing the Old Handle
Even if the head of the hammer becomes loose, the handle doesn’t come off easily due to the wedge. In such cases, drill several holes near the wedge on the head side of the handle using a 5mm metal drill bit (the depth should be about the size of the head). Loosening the handle’s wood fibers inside the head by drilling will make it easier to remove the head.
Shaping the Handle
The part that fits into the head needs to be shaped appropriately to match the size of the hole. The section of the handle that goes into the head should be crafted to taper slightly from the size of the hole, broadening towards the base of the handle. As for the base of the handle, feel free to shape it as you like. If you want to create a smooth concave finish, you can achieve this by using a plane at an angle. To prevent splitting when driving it in, be sure to make a larger chamfer at the base of the handle.

Fitting the Handle into the Head
Saw a wedge slit at the tip of the handle. It’s recommended to use two wedges. Place the wedges on the handle before inserting it into the head (before impaling). While fitting it, ensure the head sits properly and make adjustments accordingly, driving in both the wedge and the base of the handle. Finally, secure the wedge by pounding it with a punch (a tool for driving nails), and it’s complete.
Conclusion
Did you find the information about hammers helpful?
For both DIY enthusiasts and professional carpenters, the hammer is a quintessential tool in woodworking. A little awareness in its usage can really bring out the artisan in you. Moreover, maintaining and caring for your tools is part of the joy of DIY. Let’s enjoy crafting with our beloved tools, using them skillfully and stylishly.
