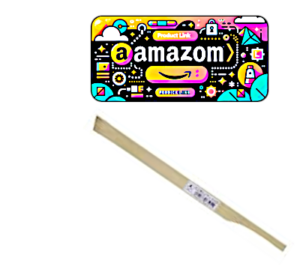
The ‘Sumisashi’ is a traditional Japanese marking pen used in construction since ancient times. It is a bamboo pen utilized by carpenters to mark processing lines on structural materials, ideal for drawing both fine and thick lines on wood. Originally, each carpenter crafted their Sumisashi by hand, and when used correctly, it can draw highly precise lines with ink.
In this article, we introduce the basic usage of Sumisashi and how to craft a user-friendly one. While commercial versions are available, crafting your own can enhance usability, so we encourage you to give it a try.
This page contains promotional content.
日本語版の記事(墨差し(すみさし)【竹製大工用墨付けペン】使い方や手作り方法を紹介)はコチラ
List of Contents
Article Author

Kentarou Fukata
A Kyoto, Japan native born in 1985, I am a seasoned carpenter boasting five national qualifications in housing-related disciplines in Japan. Committed to the dissemination of carpentry expertise, I actively contribute to professional development within the field through instructional content on YouTube.
Introduction Video
Complementing the guide is an informative video designed to augment comprehension.
If you wish to utilize features like subtitles, please reopen the video on YouTube. You can access the subtitles through the ‘CC’ button on the playback screen or in the settings.
Characteristics and Handling of a Sumisashi
Insights into Sumisashi
A Carpenter’s Marking Instrument
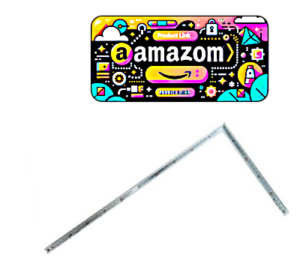
A sumisashi is a dedicated tool for carpenters to apply processing lines on structural wood, used in combination with a framing square (sashigane) and an ink pot. It functions like a pen, where the tip is first dipped into the ink pot before marking the wood. Its design, featuring edges and a straight form, allows for marking on uneven surfaces by extending the tip to apply ink, even where a ruler might not lay flat.
Optimal for Wood Marking
The use of sumisashi results in dark, fine lines on wood. It can apply ink effectively even on slightly moist timber or materials that have been treated with modern preservatives, ensuring smooth writing. Additionally, the opposite end of the pen serves as a marker, allowing for the simultaneous labeling of parts.
Handling Techniques for Sumisashi
Moisten Before Use
Bamboo sumisashi should be used in a well-moistened state. Bamboo becomes brittle and prone to breaking when dry, which could lead to damage. Ink applied for marking on wood also tends to dry more quickly.
Clean Ink Stains as You Work
Unlike pencils, using a sumisashi often results in ink stains on your hands or tools like framing squares. To prevent these stains from transferring to the wood, it’s necessary to wipe them off with a rag while working. Once ink is applied, the only way to remove it is by shaving off with a hand plane or chisel.
The Usage and Shape of a Sumisashi
Shape of a Sumisashi
A Sumisashi is a flat, pen-like tool made from the surface of bamboo. It varies in length from 25 cm to 35 cm, in thickness from 4 mm to 8 mm, and in width from 12 mm to 15 mm, with the size preferences changing according to the maker. The tip of the pen is crafted by flattening the surface’s curvature and finely splitting it widthwise to hold ink. The angle from the back to the front is approximately 40 degrees, and the width side is beveled at about 70 degrees to suit the dominant hand of the user.
The marker side is formed into a rod shape of 4 mm to 5 mm, with the marker tip being hammered until fluffy to hold ink.
Basic Usage of a Sumisashi
For right-handed users, the Sumisashi is held with the tip up and tilted to the left when viewed from the backside. It’s a common misconception with steel markers, which are used in the opposite orientation.
Basic Technique for Drawing Ink Lines (Proper Use)
For right-handed individuals, when you hold the framing square with your left hand, you use the Sumisashi in such a manner that the beveled back side’s surface makes contact with the framing square, angling it horizontally against the wood. By accurately aligning the back side’s bevel angle, you can draw precise ink lines even on wood surfaces that have slight irregularities.
In Situations Where the Framing Square and Wood Are Not in Direct Contact (Upside-Down Use)
For marking on round logs or similar situations where the framing square does not directly touch the material, the Sumisashi is used in a reversed manner. *Reversed in this context refers to the direction where the Sumisashi’s surface faces towards the framing square. By keeping the Sumisashi’s surface (the skin side) at an accurate angle, you can draw correct lines even when the framing square is elevated from the material.
Marking Technique (Measuring and Marking Dimensions)
When using a framing square to measure and mark dimensions on wood, it is advisable to use the shorter end (the side closer to you) of the Sumisashi’s tip (the angled part). *A common mistake is to use the tip as if it were a pencil.
Therefore, a more obtuse angle (closer to a right angle) on the Sumisashi’s tip makes it easier to use.
*Be cautious as commercially available ones often have a much sharper angle.
Using the Various Parts of a Sumisashi
Utilizing the Side Surface
The side surface of the Sumisashi, towards the end direction, is straight and used as a ruler. For instance, when there is a skin side on the corner of a square material, you use the Sumisashi’s straight side surface to find the starting point (the corner of the material) with the framing square.
Regarding the Marker Part
The tip at the butt side of the Sumisashi serves as a nib for drawing thick lines, similar to a marker. Its primary uses include marking names for assembly on structural materials or writing instruction lines. Given the hardness of the Sumisashi’s tip, it’s challenging to write continuous curved letters like “は,” “ほ,” or “ぬ,” so some ingenuity is required.
*In Japanese wooden architecture, hiragana names such as “い, ろ, は, に, ほ, へ, と” are used. It’s crucial to practice writing cleanly as assembly can be hindered if the characters are unreadable.
Characteristics of Bamboo
Bamboo is widely used around the world for various applications due to its affordability, hardness, and ease of splitting. Here is a summary of the characteristics of bamboo that are particularly relevant to making Sumisashi.
Types of Bamboo
For crafting Sumisashi, “Madake” bamboo is utilized. The preferred size of the bamboo used as material has a diameter of about 60 mm, internodes around 40 cm, and a thickness of about 7 mm.
*It’s worth noting that in Japan, there is also “Moso bamboo,” which is thick and cultivated for bamboo shoots, but it is not considered suitable for making Sumisashi.
Regarding the Direction for Splitting Bamboo
Understanding the easier direction for splitting is essential when working with bamboo. Splitting from the leaf side (the upper side in its natural state) is easier and results in a cleaner split.
*As an additional note, when splitting wood, it tends to be easier to split from the base side.
Making a Sumisashi
Traditionally, Sumisashi were individually handcrafted by carpenters, tailored to fit the specific needs and preferences of their use. The advantage of making your own over purchasing one is the ability to create a tool that is perfectly suited to your personal handling and usage. Below is a guide on how to craft one.
1. Soaking in Water
To begin making a Sumisashi, start with preparing bamboo and then soak it in water to soften. Ideally, it should be submerged for several days until it has absorbed enough water to sink.
2. Shaping
Use a hand plane to mold it into your preferred size. A larger width and thickness will retain more ink, while a smaller size becomes easier to handle.
The side surface, which will serve as a ruler, should be processed into a straight line, ensuring the tip’s cross-section forms a solid rectangle. Since the bamboo’s outer surface (skin side) is the most durable, try to preserve as much of this layer as possible when reducing thickness. Only the tip’s curvature should be planed off to shape.
*Personally, I prefer smaller sizes, around 12 mm in width and 3 mm in thickness, but it doesn’t have to be this small.
3. Incorporating Incisions into the Pen Tip
To improve the Sumisashi’s ink retention, it is finely split as much as possible.
During this process, please check the direction of the split. To determine the orientation of the bamboo, observe the natural tapering of the node sections.
Tips for Fine Splitting
Since it’s difficult to split the bamboo tip when it’s at a 90° (right angle), process it to about a 30° angle before splitting. Splitting at a 1.5 mm pitch with this 30° angled section will result in a finish of approximately 0.5 mm to 0.7 mm.
*Splitting too thinly can lead to the bamboo breaking inside, so this thickness is considered optimal.
Safe Method to Avoid Injury During Splitting
Handling a blade towards yourself while making incisions in the Sumisashi can be dangerous if done incorrectly. To avoid injury, wrap the chisel’s blade with the palm of your right hand, hold the bamboo tip with your left hand, and maintain a safe distance between your right hand and the bamboo using your left thumb and index finger. Make incisions by flipping the wrist of your right hand only. After making an initial cut about 5 mm from the tip at the aforementioned pitch, lightly twist the chisel to widen the split to about 1 cm deep.
Tips for a Durable Sumisashi
Since the sharper angles of the Sumisashi’s tip are prone to breaking, it is recommended to make the first split on the sharper side slightly thicker. I typically go for about 1.2 mm.
4. Deepening the Split
Creating a Splitting Tool
In the step of deepening the split, create a blade-like tool using the leftover bamboo from making the Sumisashi. This tool should be about 15 mm in width and 3 mm in thickness. Use the hard outer layer to sharpen it as much as possible.
*Using a cutter or similar sharp object can shave off the split surfaces, causing the pen tip to widen. Moreover, using a bamboo splitter reduces the risk of injury, making it the recommended choice.
Method for Deepening the Split
Insert the tool into the previously made incision and twist to advance the split. Forcing the tool too aggressively can cause the split surfaces to fray, which can lead to the widening of the pen tip. Aim for a depth of about 4 cm in the final split.
Tips for Easier Splitting
Before proceeding with the deepening, pre-split several lines (about 5 mm pitch) deeper than the final desired depth by approximately 2 cm. This pre-splitting not only makes the initial deepening process easier but also facilitates future splitting efforts.
5. Finishing the Tip Shape
After confirming the direction of use as previously described, finish shaping the tip by cutting it diagonally with a chisel. The angles that are generally comfortable to work with are about 75° to 65° in the width direction and 35° to 40° in the thickness direction. Ensure the tip forms a straight line, and the cut surface is flat.
6.Creating the Marker End
Now that the pen tip is complete, it’s time to work on the opposite end, the marker tip. Shape the marker end into a cylindrical form by carving it down to a comfortable thickness. *Note that the carving should be done on the side opposite to the pen tip.
After shaping, place the marker end on a piece of wood and use a hammer to crush it slightly. Once it’s somewhat crushed, use a chisel to round off and refine the marker end, then hammer it again to make it fluffy and round. With this, the Sumisashi is complete.
7.Adjusting Through Use
Once complete, test it out and adjust according to preference. Ensure the Sumisashi is well moistened with ink, then wipe off the surface ink with a rag before use. As the Sumisashi is used, the tip may wear down, so re-shape it with a chisel as needed.
If the splits become shallow over time, gently press and rub the split area with your fingers to gradually deepen the split.
Conclusion
Have you become interested in Sumisashi? Sumisashi is a unique tool among carpentry implements, being made of bamboo, and it carries the added joy of being a tool you can craft yourself. I still remember the fun I had when I made my first Sumisashi, taught by my master. I encourage everyone to try making and using one for themselves.


